View RSS Feed

Turbosek

Work Continued On My 162 Gallon In Wall Tank

Rate this Entry
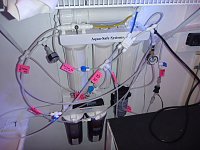
Ok, I have been busy for the last month working on my 162 gallong in-wall tank. Wow, this was a lot more work than I thought it would be. I have a much better appreciation for everyone out there in this hobby. I am sure part of my issues have been the area I am working in. While it is the perfect location for the system, it is a tight fit.

I still have a bit more equipment to buy and install. I have been doing some reading around the web on the best way to start a new reef tank once it is full of water. Thes best place so far is the following site:
http://www.chucksaddiction.com/cleanupcrew.html
If some of you have some other places, please let me know.

Click image for larger version

Name:	P1000224.jpg
Views:	292
Size:	84.2 KB
ID:	1544Click image for larger version

Name:	P1000223.jpg
Views:	299
Size:	80.9 KB
ID:	1543
Click image for larger version

Name:	P10002172.jpg
Views:	341
Size:	122.3 KB
ID:	1546Click image for larger version

Name:	P1000218.jpg
Views:	304
Size:	120.7 KB
ID:	1542
Click image for larger version

Name:	P1000214.jpg
Views:	304
Size:	96.7 KB
ID:	1541Click image for larger version

Name:	P1000219.jpg
Views:	312
Size:	106.5 KB
ID:	1540
Click image for larger version

Name:	P1000202.jpg
Views:	305
Size:	68.5 KB
ID:	1539Click image for larger version

Name:	P1000222.jpg
Views:	305
Size:	118.7 KB
ID:	1538
Click image for larger version

Name:	P1000226.jpg
Views:	315
Size:	111.5 KB
ID:	1545

Submit "Work Continued On My 162 Gallon In Wall Tank" to Digg Submit "Work Continued On My 162 Gallon In Wall Tank" to del.icio.us Submit "Work Continued On My 162 Gallon In Wall Tank" to StumbleUpon Submit "Work Continued On My 162 Gallon In Wall Tank" to Google

Updated 04-28-2010 at 10:23 PM by melev

Categories
Tank - Full Summary , ‎ DIY projects

Comments

  1. MeVsTheWorld's Avatar
    Looks great, but am curious about how you'll add rock and do maintenance with the back and sides black and without taking your lights down. Food for thought, a guy in my club ran a bed sheet behind his tank for aesthetics and if the need arose he could just take it off. He used velcro to hang it. You could also make/buy a slide rack for your lights to make it easier on yourself
  2. Turbosek's Avatar
    Black back on tank came that way from manufacturer...i know, I wish it wasnt there. It is stuck on, so I figured I better leave it. I have room enough to reach all areas of the tank when the lights are removed. I thought about a track, but opted instead to just use spring-loaded clips and plugs to easily remove lights when needed. I can still do most reaching w/o moving lights if I needed to do something simple.
  3. melev's Avatar
    Perhaps you can put some simple 'under cabinet' LED fixtures on the ceiling so when you move the pendants, you still have a way to shine some light into the reef to see what you are doing. Those are low profile and would be handy.

    Thanks for sharing your project with us.
  4. Turbosek's Avatar
    I also have 2 T5 bulbs that span the width, toward the front of the tank. I can leave these there, and still move around in the tank. I did have to build a platform that allows me to stand 3 feet high over my sump, so I can reach all the way down into the tank. Works pretty slick, and I can just lift it out of the way when not in use.

    Thanks Melev for your knowledge and inspiration with sump design and advice. Everything I learned was from your site, and made me feel comfortable about designing and building my sump.
  5. melev's Avatar
    I'm happy it helped. I was looking at your sump's layout.