View RSS Feed

baker.shawn

DIY LED fixture of fun (SOL rip off) part 4

Rate this Entry
Allot has been done since my last update and I’m happy to say the light is working! And hanging!

I made my black acrylic housings what allow for a piece of glass to slide in, this will protect from spray and splashing.

I used U channel aluminum to attach the 2 units together and hung it with my existing hanging kit from my old fixture.
Click image for larger version

Name:	IMG_0947.jpg
Views:	351
Size:	129.8 KB
ID:	4860 Click image for larger version

Name:	IMG_0946.jpg
Views:	379
Size:	108.7 KB
ID:	4867 Click image for larger version

Name:	IMG_0945.jpg
Views:	341
Size:	86.4 KB
ID:	4866 Click image for larger version

Name:	IMG_0950.jpg
Views:	337
Size:	106.9 KB
ID:	4862

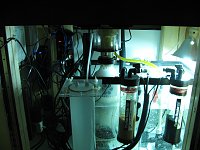
My drivers have been adjusted to 1000mA XP-G and 800Ma XP-E and mounted on a thin piece of ply under my stand,its getting a little tight down there.
Next I hooked up my dimmer to the drivers and wired my light units to the drivers...and that was it! All done!

Click image for larger version

Name:	IMG_0952.jpg
Views:	125
Size:	100.2 KB
ID:	4861 Click image for larger version

Name:	IMG_0955.jpg
Views:	124
Size:	123.2 KB
ID:	4863 Click image for larger version

Name:	IMG_0954.jpg
Views:	116
Size:	119.6 KB
ID:	4865


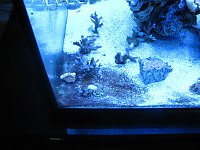
All the wiring its temporary with shrink tube, I need to make the wires longer and add connectors but that will be done latter, I also need to add on the lenses which is going to change the lighting pattern I’m probably going to have to raise up the light, currently they are about 6” from the water. Finally I’m going to waterproof the fixtures sealing between the acrylic and heat sink with black silicone and adding my glass covers

I’m still trying to decide how I’m going to control my lights...I think I may just cave and buy 2 ALC units...it’s going to max out my 4unit limit on my rkl but it will be easier and if I put a value on my time also cheaper

Once I’m totally done I’m going to make a concluding write-up and then a post summarizing the build!

Im also considering building units for others...i just don’t want to assume responsibility if something were to happen.

oh yeah and im also fighting cyano

Click image for larger version

Name:	IMG_0951.jpg
Views:	126
Size:	146.7 KB
ID:	4864

Submit "DIY LED fixture of fun (SOL rip off) part 4" to Digg Submit "DIY LED fixture of fun (SOL rip off) part 4" to del.icio.us Submit "DIY LED fixture of fun (SOL rip off) part 4" to StumbleUpon Submit "DIY LED fixture of fun (SOL rip off) part 4" to Google

Updated 04-17-2011 at 11:22 PM by baker.shawn

Categories
Tank Entry , ‎ Electrical , ‎ Lighting , ‎ DIY projects

Comments

  1. pepper'scove's Avatar
    This is awesome man! I used the link you gave to me awhile back and have learned a lot about LED fixtures since then. I will probably end up doing the project the way you did it as it seems like it will be most useful in the long run. However, I'm also trying to figure out a way to control the lights with my own homemade lighting controller. I currently plan to try and see if I can make everything work running a NetBurner MOD 5231 microcontroller. It has plenty of processing power and a large enough amount of built in memory, but I'm still trying to figure out how to wire the controller into these lights since the board I'll be using only outputs 3.3V.

    By the way, the lights look absolutely beautiful in the pics! Thanks for sharing!!