melev
More concrete work... urgh!

by
, 01-05-2011 at 09:06 PM (15069 Views)
Dragging my feet on this project because frankly I've never done it before and didn't relish the idea of having to deal with it, I filled in where the concrete floor was too low. This was an important hurdle in my eyes, and I was dreading it. In the end, it wasn't awful, but then again I'm not entirely done. Here's how it went.
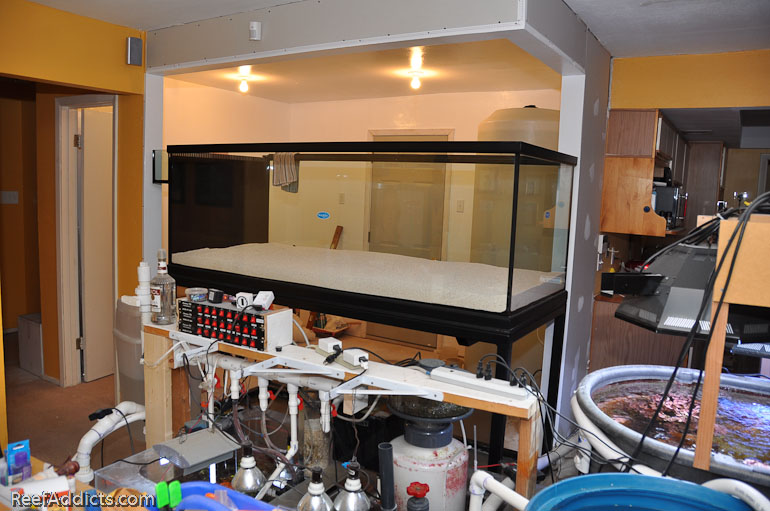
The metal stand is up on shims to get the stand and tank completely level. The slab was down nearly 1" at one corner, and any water spills would inevitably head toward the livingroom area. Additionally the sump was going to be un-level as well.
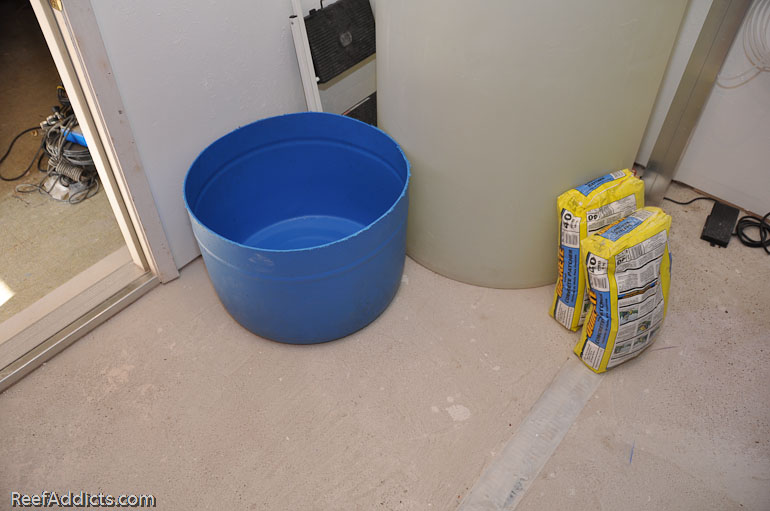
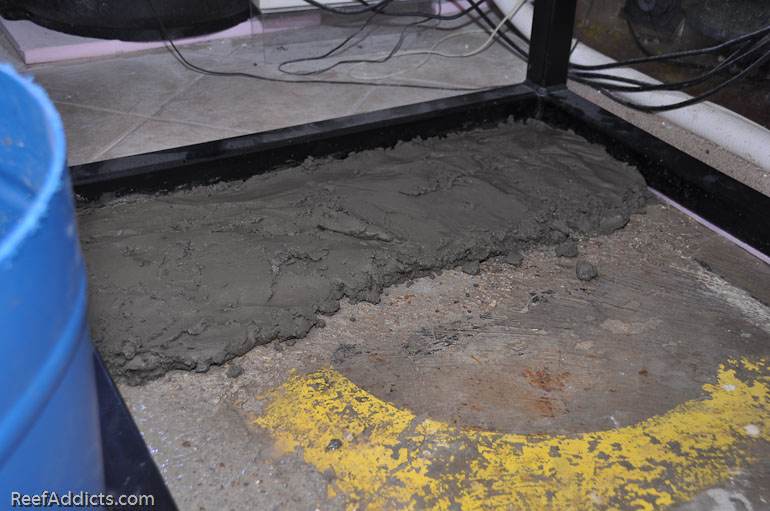
I talked to the flooring guy at Home Depot, and their leveling stuff wasn't going to work. It is designed to be poured out on the floor and wherever it pools up, that's what is filled. You can't slope it. I need this stuff to be much thicker and slope toward the french drain. I bought a type of concrete that contains vinyl adhesive. Three bags at $12.50 each. I needed a container to mix them in, so I cut a barrel down to usable size.
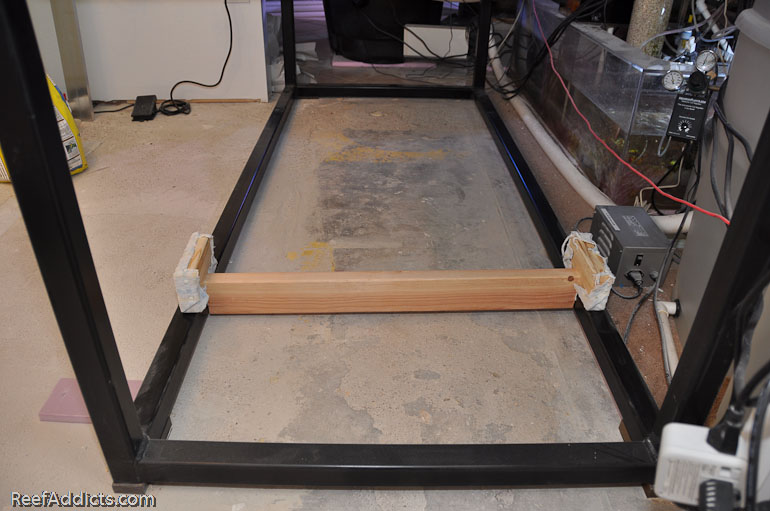
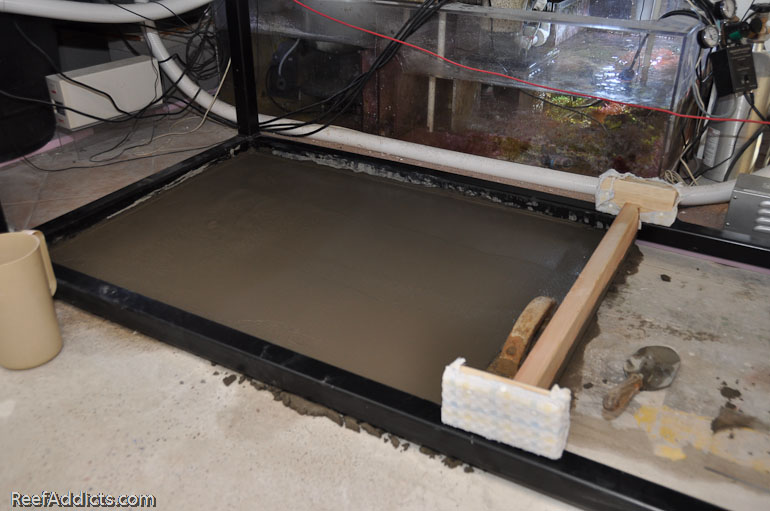
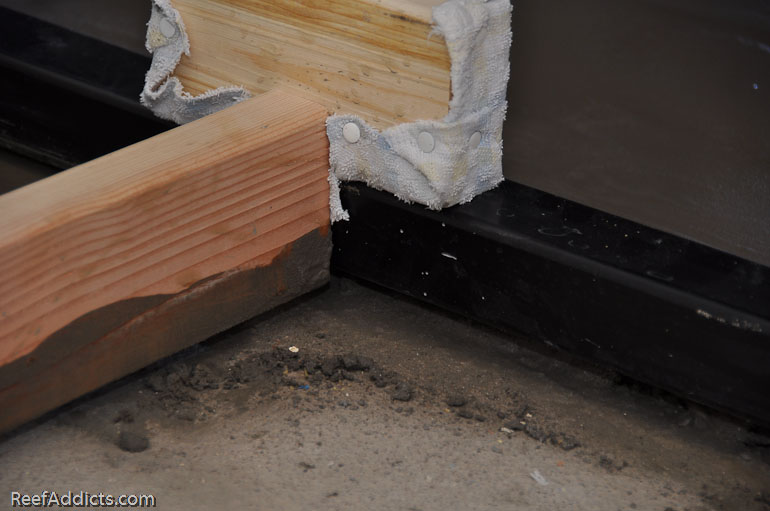
I decided I needed a drag board that would level the fresh concrete. I can't remember which friend suggested it, but he told me to make the drag board sloped to get that slight drop I wanted. I thought about concrete and lumber dragging against my pretty powder coated steel stand and came up with a soft solution to keep the damage to a minimum.
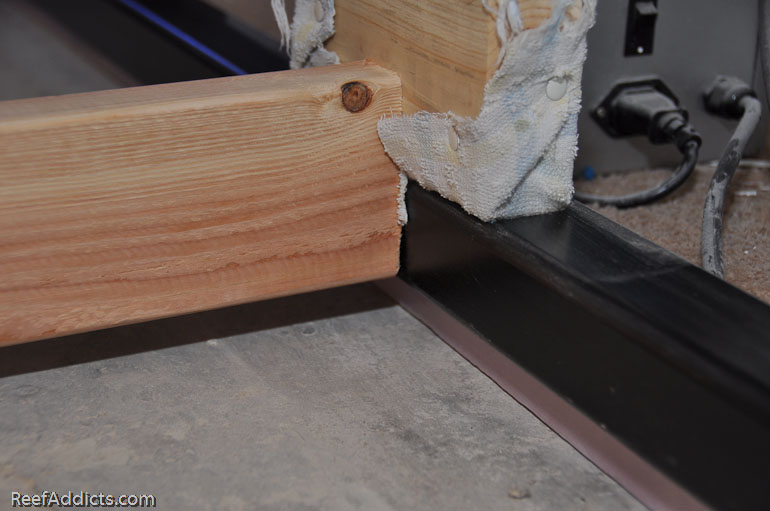
I built the drag board so that it had a slider at each end to run along the top of the metal frame. Then I wrapped and tacked some fabric on each end to avoid rubbing the wood on the finish.
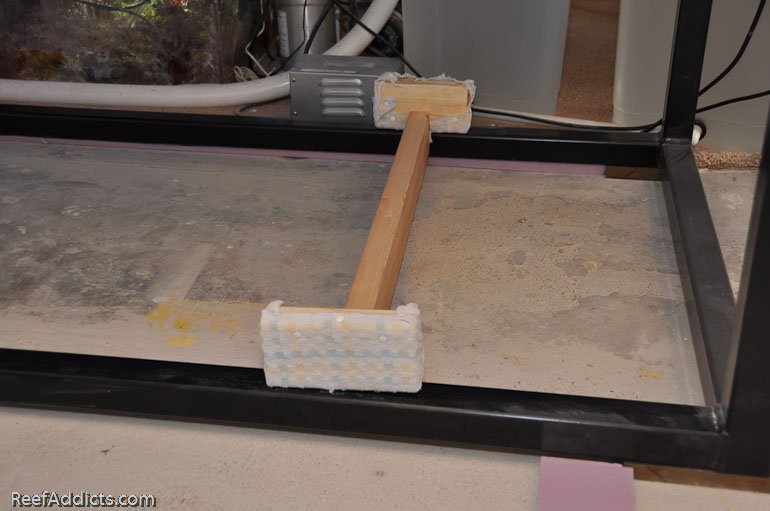
This end is even with the stand. The slider board is 2" up, the same thickness as the square tube pipe. Also, you can see the pink foam filler I cut and inserted under the steel to keep the stuff from running under and being an ooze problem.
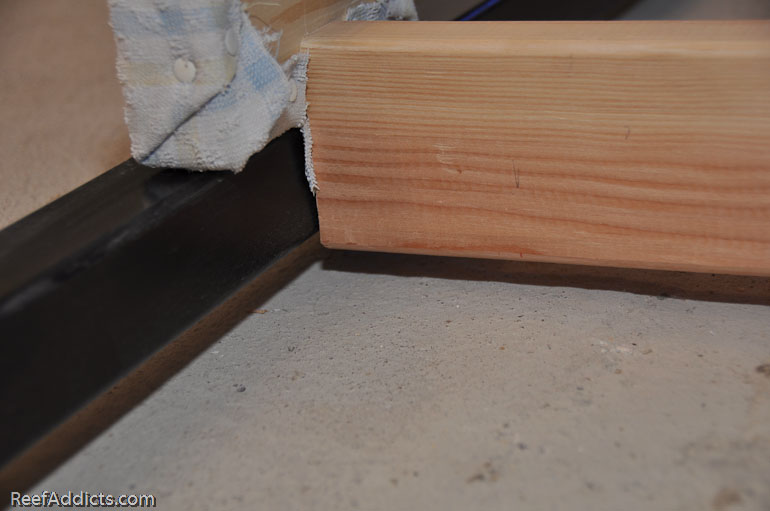
The opposite end is lower than the frame, with the slider board affixed 2 1/4" above to run along the top of the square pipe.
All I had to do was pour in the concrete, drag this board toward the opposite end and I'd have the perfect pad poured, with it tilting just a tad toward the french drain. The plan was after the inside was done to do the area between the stand and the drain to contain the flow of water.
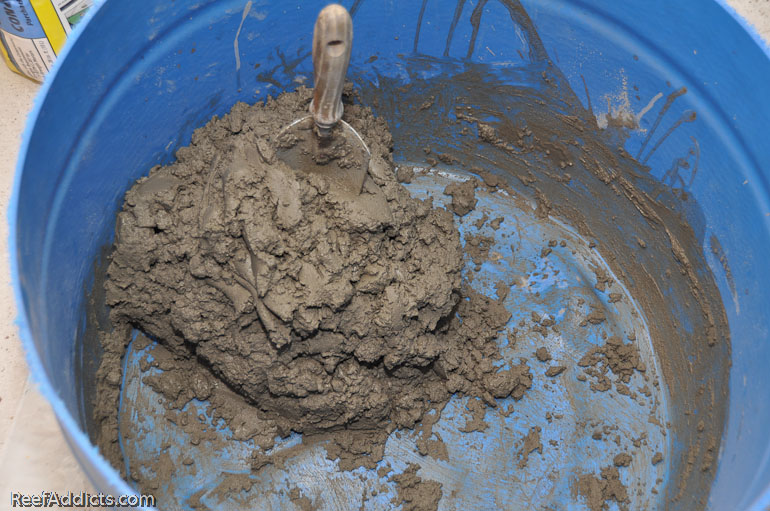
I mixed up the concrete with some water. A 40lb bag needs a little more than 3/4 of a gallon of water.
I poured water on the dry concrete area as directed. Then using a junk paint brush, spread out the water evenly over the entire area I was about to work.
A few scoops worth.
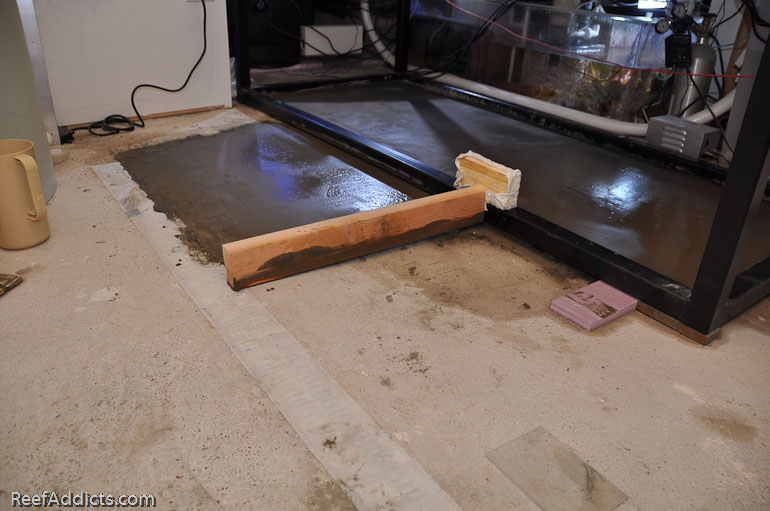
Don't let me fool you; this was NOT easy. I worked that board back and forth a lot and there was an area in the middle that kept ripping up leaving an ugly hole. I tried every trick I could think of, wiggling the board back and forth, refilling the area that wouldn't stay filled, leaning the board to create a slimmer angle against the concrete. It was a real pain. At this point, the first bag was used up.
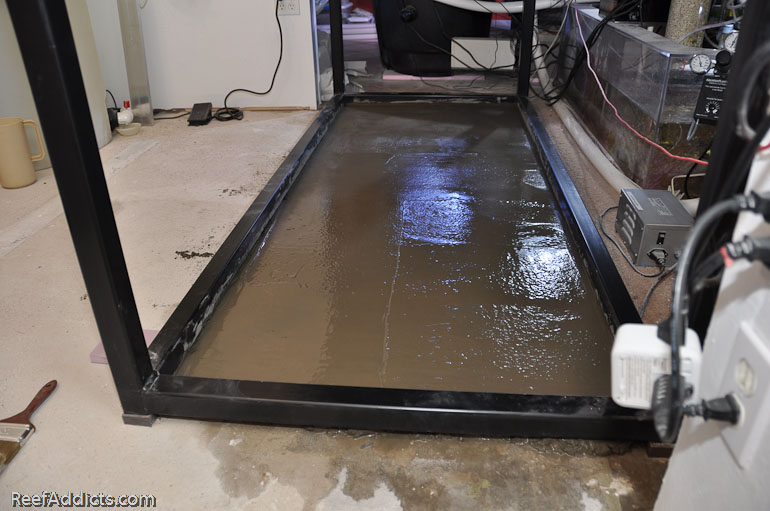
I mixed up the second bag, and continued. Once it was poured in, I used some 1/4" acrylic to clear out a slight gap between the bottom of the metal frame and the top of the new concrete to maintain that necessary gap in case there's a leak. I ran out of concrete and had to buy a third bag just to be able to fill the last of it, which was the thickest of course. In the end, it took 2.5 bags to fill the area and get it level.
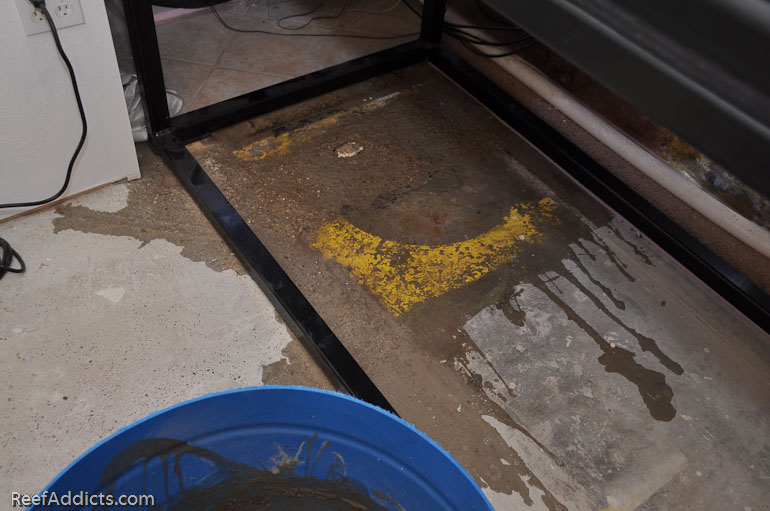
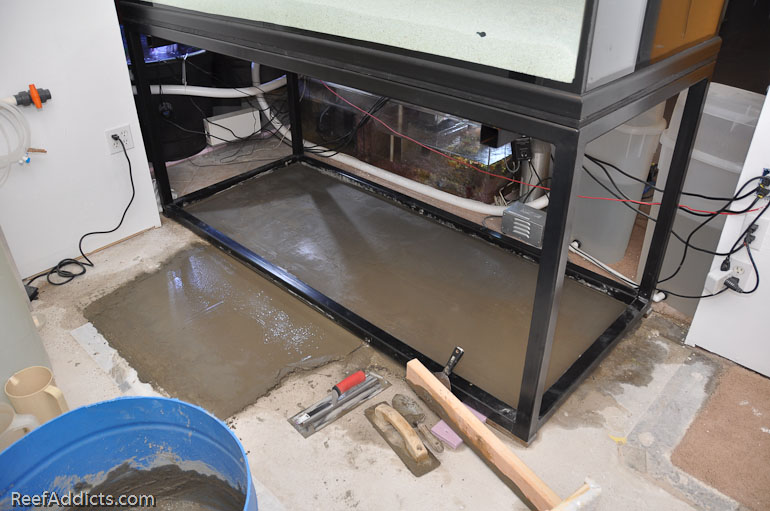
Once troweled smooth, I used the last of the mix to start on the area that flows toward the french drain. This is as far as I got today, and I'm guessing I'll need two more bags to work the rest of the area around the tank. I don't want to go crazy and do the entire room, so I'm targeting the main area under and around the tank. I'll build up a small dam between the stand and the neighboring walls to assure water can't travel into the kitchen or living room.
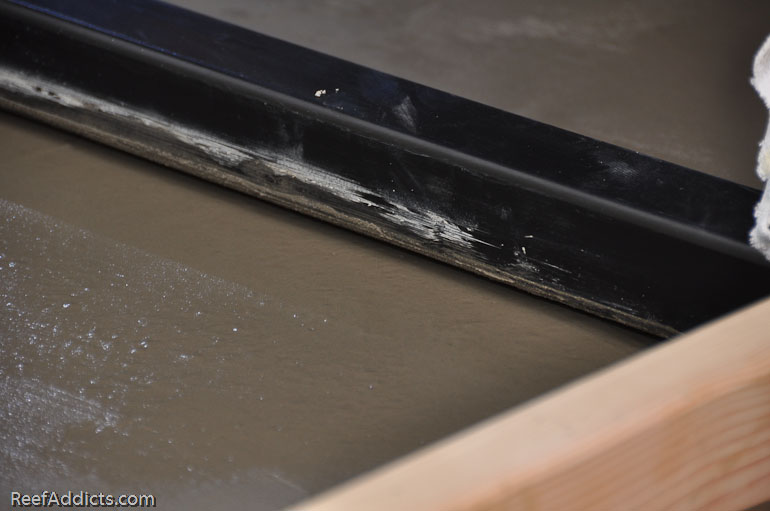
My same form was just as handy on the outer section, still maintaining that 2 1/4" drop that runs to 0" at the floor drain.
You can see the gap pretty well here. If there's a leak, it has somewhere to go.
Originally, I was going to put pond liner in the stand, folding it up on three sides to only have one outlet. However, I think instead I'll just run a good bead of silicone around the perimeter. Or maybe I'll lay down the rubber and then run the bead of silicone. Something like that, anyway.
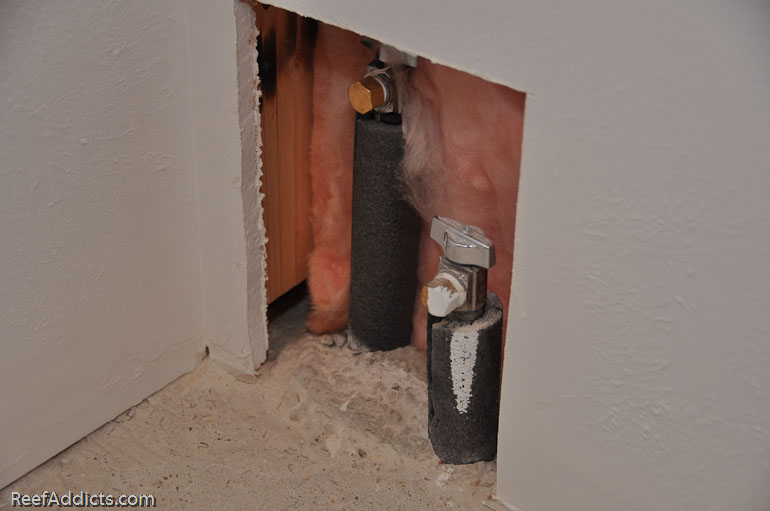
Yesterday, I had a request for more images of the plumbing access panel. Here's one picture from inside the fishroom. This will be hidden from view by the cabinet that the sink will go in.
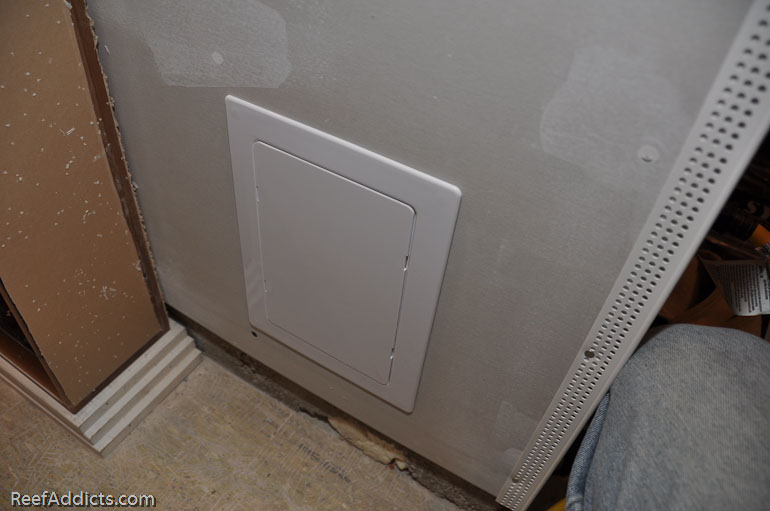
On the garage side, this is that panel, available at Home Depot or Lowes.
Prying it out, you can see the thin layer of insulation I tucked in to keep the cold air out of the plumbing.
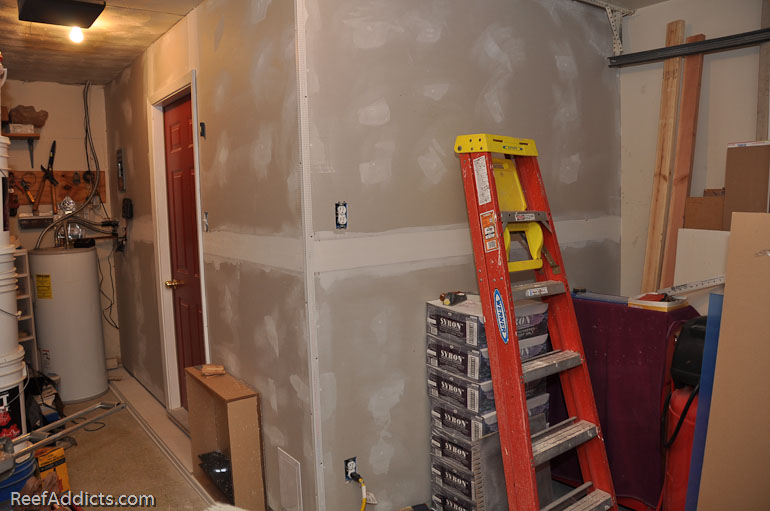
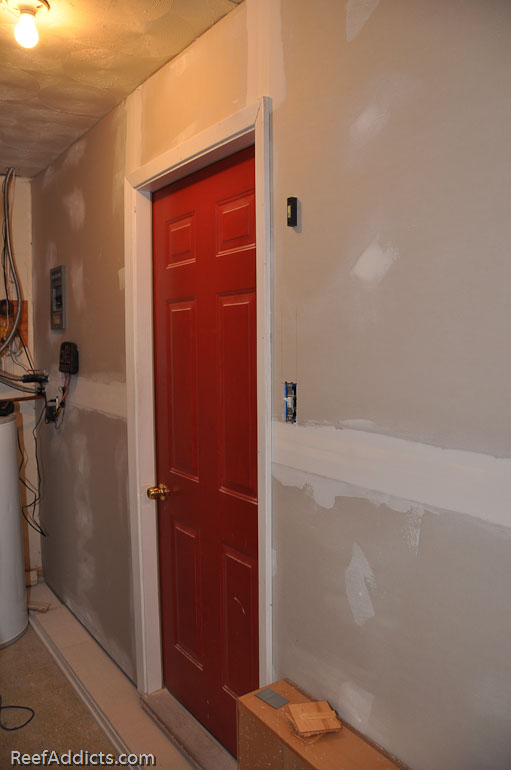
And while I was shooting pictures, here are two of the garage side taken with the D90. The walls still need a little more work to cross them off my list.
Air Tank Shot for January. Soon to be updated with a wet version.